
The deadlift is the most useful exercise in the gym. It trains nearly every muscle from your traps to your calves in a single rep, builds the kind of functional strength that translates directly to picking up groceries and chasing your kids around the yard, and produces faster aesthetic results than almost any other lift. It’s also the exercise people are most afraid to learn — usually because of bad gym mythology about “deadlifts wrecking your back.” Done right, the deadlift protects your back. Done wrong, anything will hurt you. This guide walks through the technique step by step, the common mistakes that cause injury, programming for beginners, and the variations that solve specific weaknesses.
Quick Hit
The conventional deadlift starts with the bar over mid-foot, hips hinged back, neutral spine, lats engaged. Drive the floor away through your heels, finish standing tall. If anything rounds, the weight is too heavy — drop 20% and rebuild form.
What the deadlift actually trains
The deadlift is a posterior chain compound: it loads your glutes, hamstrings, lower back, mid-back (rhomboids, traps), forearms, and core simultaneously. It’s the most “total-body” exercise in standard gym programming — even more than the squat, which has a slightly narrower muscular emphasis.
That breadth is what makes it so effective. A single deadlift session trains the muscles you’d otherwise need 4-5 separate exercises to hit. It also delivers neurological adaptations (recruitment, intermuscular coordination) that improve every other lift in your program.
The conventional deadlift, step by step
Setup (the foundation)
Step 1 — Bar position: Stand with the bar centered over your mid-foot. The bar should be about 1 inch from your shins when you look down. Not against your shins (yet), not out at your toes.
Step 2 — Stance: Feet hip-width apart, toes pointed straight ahead or very slightly out. Most lifters’ deadlift stance is slightly narrower than their squat stance.
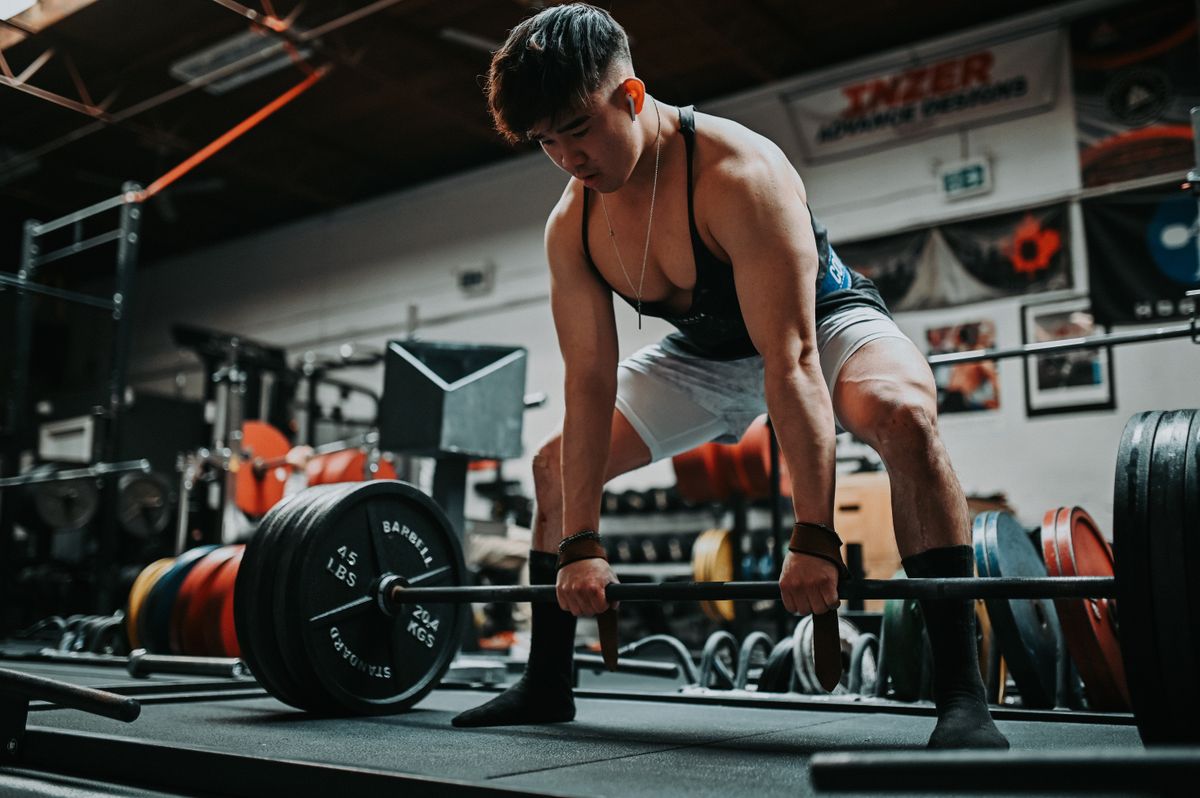
Step 3 — Hinge down to the bar: Without bending your knees yet, push your hips back as far as they’ll go, letting your torso angle forward. Then bend your knees until your shins lightly touch the bar.
Step 4 — Grip: Reach down and grab the bar just outside your shins (about shoulder-width). Use a double-overhand grip to start. Eventually you’ll switch to mixed grip (one hand over, one under) for heavier weights, but learn the basic version first.
Step 5 — Tighten up: Take a deep breath into your belly (not your chest). Brace your core like you’re about to take a punch. Pull your shoulders down and back, engaging your lats. Look at a spot on the floor about 6 feet in front of you — neutral neck.
The pull
Step 6 — Start the pull: Don’t yank. Slowly take the slack out of the bar (pull it tight against the plates). Then push the floor away through your heels. The bar should travel straight up — vertically — staying in contact with your shins the entire way.
Step 7 — Lockout: As the bar passes your knees, drive your hips forward to stand fully upright. Squeeze your glutes hard at the top. Stand tall, shoulders back, but don’t lean backward — that’s just spine compression with no added training value.
Step 8 — Lower: Hinge back at the hips first (don’t bend knees first), then bend knees only once the bar passes them. Controlled descent. Set the bar down completely between reps for proper form work — no bouncing.
The five most common deadlift mistakes
1. Rounding the lower back
The cardinal deadlift error. When you can’t keep your back flat under the load, the spine flexes and the discs get loaded in a position they’re not built for. This is what people mean when they say “deadlifts hurt my back” — but it’s a form problem, not an exercise problem.
The fix: lighter weight + film yourself from the side. The line from your tailbone to the base of your skull should look like a single straight rod throughout the lift. If it curves, drop weight by 20% and rebuild.
2. Bar drifting away from the body
If the bar travels out in front of your shins rather than straight up, you’ve put massive leverage on your lower back. The bar should stay in contact (or near-contact) with your shins and thighs throughout the entire pull.
The fix: engage your lats. Cue “protect your armpits” or “pull the bar into your body” — this creates the back tension that keeps the bar’s path vertical.
3. Hyperextending at the top
Some lifters lean back at lockout, thinking they’re “completing” the rep. They’re actually compressing the spine and risking injury. Proper lockout is just standing tall — shoulders over hips, glutes squeezed, neutral spine.
4. Starting too far from the bar
Walk up to the bar so it sits over the middle of your foot, not over your toes. Starting too far away forces the bar to travel forward at the bottom of the lift, killing the vertical path and overloading the back.
5. Looking up
Craning the neck up to look in the mirror compresses the cervical spine and breaks the neutral-spine principle. Look at a spot on the floor 6 feet in front of you. Head stays in line with the spine the entire rep.
Film Yourself
Set your phone on the floor about 6 feet to your side, propped against a water bottle. Record every working set. Watching the playback catches form breaks you can’t feel in the moment. This is the single highest-ROI habit for learning deadlift technique.
How much weight should I deadlift?
Starting weight
Most untrained adults can deadlift somewhere between 95-135 pounds with proper form on day one — but the right number is whatever you can do with perfect technique for 5 reps. If you can’t keep a neutral spine, you’re too heavy.
Intermediate benchmarks
After 6-12 months of consistent training, common benchmarks: untrained women can typically deadlift around 0.75x bodyweight, intermediate women 1x-1.25x bodyweight. Untrained men around 1x bodyweight, intermediate men 1.5x-1.75x bodyweight. These are guidelines, not goals.
The progression principle
The number on the bar matters less than whether you’re adding weight (or reps) week over week with the same form quality. Five pounds added per week to a 135 lb deadlift puts you at 265 lb in 6 months. That’s how strength is built.
Conventional vs. sumo deadlift
Two main stances, both valid. The conventional deadlift uses a hip-width stance with arms outside the knees. The sumo deadlift uses a wide stance with feet pointed out (typically 30-45 degrees) and arms inside the knees.
Conventional is better for:
Most beginners (simpler movement pattern), people with strong posterior chains, lifters who want the most well-rounded back development, and anyone whose proportions favor longer arms relative to torso.
Sumo is better for:
Lifters with short arms relative to torso, those with hip mobility that supports a wide stance, anyone with sensitive lower backs (sumo shifts more load to the quads and adductors), and competitive powerlifters chasing maximum 1RM.
Try both. Stick with whichever feels more natural and lets you maintain better form under heavy weight. There’s no “right” answer.

Deadlift variations worth learning
Romanian deadlift (RDL)
Start standing with the bar at hip height. Hinge back at the hips, lowering the bar along your legs to about mid-shin, then return to standing. Keeps tension on the hamstrings throughout. Excellent accessory work — see our glute exercises guide for programming.
Trap bar deadlift
Stand inside a hexagonal trap bar with handles at your sides. The handle position lets you use more knee bend and less hip hinge, which is more forgiving for beginners and people with back sensitivity. Many strength coaches actually start their athletes here before introducing the barbell version.
Single-leg Romanian deadlift
Stand on one leg with a dumbbell in the opposite hand. Hinge forward, extending the back leg behind you. Brutal for balance, fantastic for glute medius and posterior chain — pairs perfectly with the hamstring stretches in our mobility series.
Deficit deadlift
Stand on a 1-2 inch platform with the bar on the floor. Adds range of motion to the pull, increasing difficulty at the bottom (the hardest part). Use as accessory, not as your primary lift.
Block pull / rack pull
Bar starts elevated (at mid-shin or knee). Reduces range of motion, lets you handle heavier weights for lockout strength. Useful for breaking through plateaus.
A simple beginner deadlift program (8 weeks)
Weeks 1-2: Learn the pattern
2 sessions per week (Monday + Thursday). Conventional deadlift, 4 sets x 5 reps with very light weight (95-115 lbs). Focus is form, video review, and building the neural pattern. Don’t worry about progression yet.
Weeks 3-4: Add weight
Same schedule. Add 10 pounds per session to each work set. By end of week 4, you should be working in the 145-175 lb range with maintained form. 4 sets x 5 reps.
Weeks 5-6: Build volume
Increase to 5 sets x 5 reps. Continue adding 5-10 lbs per session. The 5×5 protocol builds work capacity alongside strength.
Weeks 7-8: Test top set
Reduce to 3 working sets. Warm-up properly, then attempt one set of 3 reps at a heavier weight than you’ve previously handled. Track this number — it’s your baseline for the next training cycle.
By the end of 8 weeks, most beginners add 50-80 pounds to their deadlift while building rock-solid form. That base sets you up for years of progressive strength gains.
When NOT to deadlift
Active lower back pain
If you’re currently experiencing back pain that’s not from normal training soreness, skip deadlifts until you’ve been cleared by a professional. Loading a compromised spine isn’t a productive risk.
Poor sleep + maximal weight days
Heavy deadlifts require crisp neural function. Push max attempts on the days you slept 8 hours, ate well, and feel sharp. On low-sleep days, drop weight by 20-30% or switch to accessory work.
When your form breaks down within the same set
If rep 1 looks clean but rep 5 has back rounding, your working weight is too heavy. Drop weight by 10-15% and complete the set with form integrity. Always.
Recovery and supplementary work
Sleep is the multiplier
Strength gains happen during recovery, not during the lift. 7-9 hours of quality sleep is the single biggest variable affecting how much weight you can add to your deadlift over time.
Protein intake
Heavy compound lifting drives muscle protein synthesis. 0.8-1 gram of protein per pound of bodyweight, daily, supports recovery. See our high protein breakfast guide for ideas.
Mobility work
Hip flexor stretches, hamstring stretches, and thoracic spine mobility keep the deadlift pattern clean over time. 10 minutes after each session of hip flexor and hamstring mobility pays off.
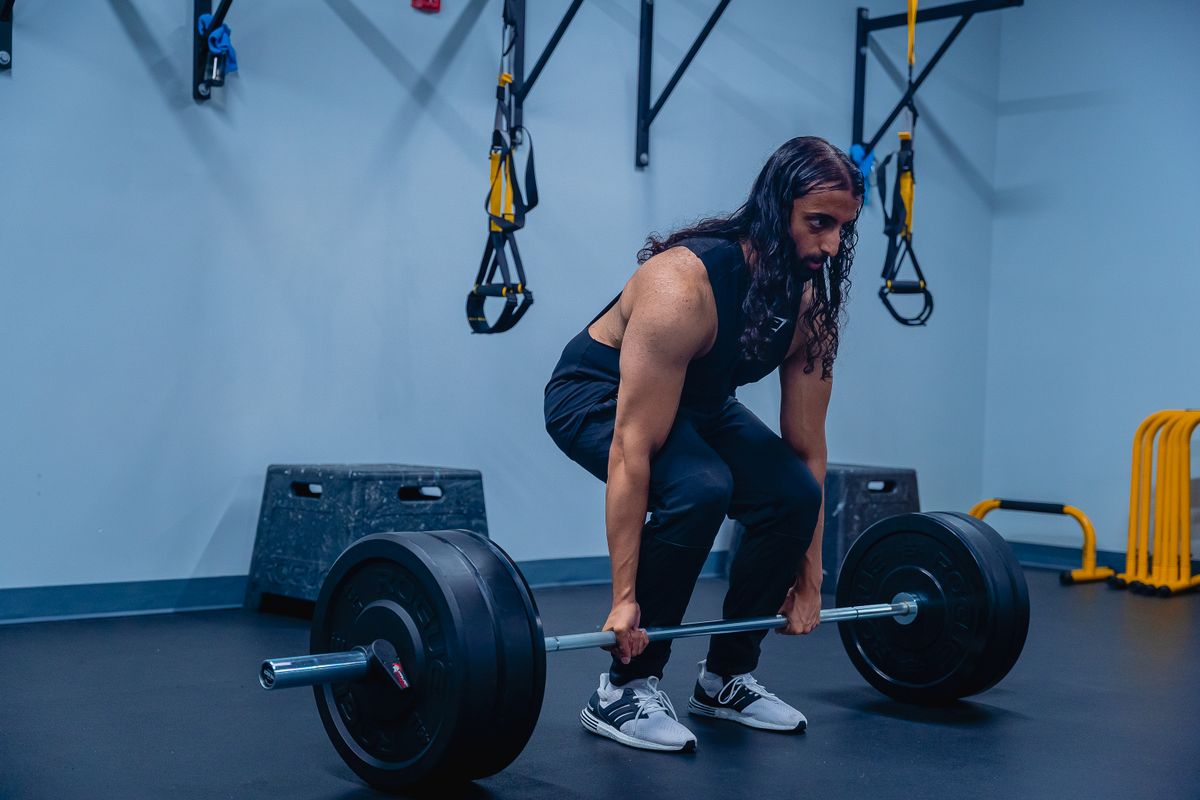
Deadlift FAQ
Is the deadlift safe for beginners?
Yes, when learned properly. The deadlift’s reputation as “back-wrecking” comes from people loading too much weight before they own the pattern. Start light, master the form (ideally with video review), and the deadlift is one of the safest and most productive exercises in any program.
How often should I deadlift?
1-2 times per week for most lifters. The deadlift is taxing on the central nervous system, so it needs more recovery than other lifts. Splitting into one heavy session and one lighter/variation session works well at intermediate levels.
What muscles does the deadlift work?
Hamstrings, glutes, lower back (erectors), upper back (rhomboids and traps), lats, forearms, and core. It’s the most complete posterior-chain exercise available, plus significant quad involvement on the initial drive off the floor.
Should I wear a belt for deadlifts?
Not at first. Learn to brace without one — that core strength is part of what you’re building. Once you’re consistently lifting near max effort (typically 80-90% of 1RM or heavier), a belt adds intra-abdominal pressure and lets you safely handle more weight.
Why does my lower back hurt after deadlifts?
Almost always a form issue: rounding the lower back, letting the bar drift away from the body, hyperextending at the top, or simply working too heavy too fast. Drop weight 20%, film your form, and watch for the cardinal mistakes listed above. Sharp or radiating pain warrants professional evaluation.
Can I deadlift with bad knees?
The trap bar deadlift is often the friendliest option — the handle position lets you use more vertical torso and less knee bend than a barbell. Conventional and Romanian variations are also typically knee-friendly because the load travels vertically rather than through deep knee flexion like a squat.
How long does it take to add 100 pounds to my deadlift?
For a beginner training consistently 1-2 times a week with proper progression, 6 months is a reasonable goal. After the beginner phase, gains slow significantly — adding 25-50 pounds per year is more realistic for intermediate lifters.
What’s the difference between deadlift and Romanian deadlift?
The conventional deadlift starts with the bar on the floor and uses more knee bend. The Romanian deadlift (RDL) starts standing with the bar at hip height and emphasizes the hip hinge — less knee bend, more direct hamstring loading. Both have a place in a well-rounded program.
Keep going
The deadlift is a long-term investment — gains keep coming for decades when programmed and recovered well. Pair this with our glute exercises pillar and hamstring stretching guide for a complete posterior chain program. Browse more workout guides on EatFitFuel.
Related on EatFitFuel